
Showing posts with label Food. Show all posts
Showing posts with label Food. Show all posts
Tuesday, April 12, 2011

Monday, March 28, 2011
Curried Sweet Potato Fries with Yogurt-Hummus Dipping Sauce
If we've met, and talked about food/cooking for about two seconds, then you probably know that I love Joy the Baker. I love her blog, her writing style, her food styling, and almost every single recipe she's ever posted. Many of the recipes you see on this site are from her. This is one of them!
The Fries:
1 Sweet Potato
1 Egg white
1 Tablespoon Olive Oil
Turmeric
Cumin
Curry
Ginger
Preheat your oven/toaster oven to 400 degrees. Get out a cookie sheet that will fit in said oven.
Peel the sweet potato and slice it down the middle, width-wise. Keep slicing until you have fry-sized spears and put them in a bowl.
Whisk the egg white, olive oil and spices and pour over the fries. Toss to coat with the mixture. Place them on the baking sheet in one layer and bake for roughly 30 minutes.
Dipping Sauce
1 cup greek yogurt
3/4 cup hummus
cumin
lemon juice
salt
olive oil
While the fries are baking mix all this nonsense together and put it in a pretty bowl.
Serve the fries right out of the oven. Yum!
Thursday, March 24, 2011
Spring Frittata
Euuugh long time no blog. I just got back from a trip back home to California where I ate SO MUCH FOOD. My mother's birthday, bless her, was accompanied by Champagne (daily...), oysters, foie gras, filet mignon, miniature red velvet cakes (courtesy Yours Truly), shoe and bag shopping, and general horsing around. Oh, and a potato and asparagus frittata so delicious that I forgot to take a picture. Here's what you do:
Ingredients
2 Potatoes, thinly sliced (very thin. Like, really super thin)
1 Onion, sliced thin
2 Shallots, chopped
8 Eggs laid by chickens that live in your backyard and eat fancy market lettuce and apples every day of their cursed, avian lives.
1/2 Tub of Cowgirl Creamery Fromage Blanc with fresh herbs (looooololol. j/k, any old soft cheese will work well - goat particularly)
1 Bunch of Asparagus, chopped
1 Bunch of Green Onions, chopped
Salt and Pepper
Fresh baguettes, French press coffee with fresh steamed milk, strawberries grown in free trade soil that have been serenaded daily, Odwalla tangerine juice and Roederer mimosas. Also, fresh baked pastries. Oh god, I love California.
Preheat the oven to 350. You're going to need two skillets, and they need to be oven proof (use cast-iron, I freaking love cast-iron). Melt a bit of butter in a skillet and sautee your onions. After a couple of minutes, add the sliced shallots. When they start to get transparent and smell good, add your sliced potatoes and let them sit, spread them out, let them sit, rearrange them, etc, for a couple of minutes. Then cover them and put the whole skillet in the oven for 15 to 20 minutes, until the potatoes are tender (but not totally soft).
While the potatoes are in the oven, whisk your eggs, salt and pepper and add the cheese, mixing it in as thoroughly as possible. Don't worry if it's a little chunky, you just want the cheese to be evenly distributed. Coat the cast iron skillet with a bit of butter. When the potatoes and onions are done, take them out of the oven and transfer them to the cast iron pan. Move things around to be sure everything is evenly distributed. Sprinkle the chopped asparagus over everything, pour the egg/cheese stuff, sprinkle the green onions and finally give the whole shebang a sprinkle of salt and pepper. Cover and place in the oven for a half an hour, remove the cover and bake for another 10 minutes. Eat it while it's hot!
Ingredients
2 Potatoes, thinly sliced (very thin. Like, really super thin)
1 Onion, sliced thin
2 Shallots, chopped
8 Eggs laid by chickens that live in your backyard and eat fancy market lettuce and apples every day of their cursed, avian lives.
1/2 Tub of Cowgirl Creamery Fromage Blanc with fresh herbs (looooololol. j/k, any old soft cheese will work well - goat particularly)
1 Bunch of Asparagus, chopped
1 Bunch of Green Onions, chopped
Salt and Pepper
Fresh baguettes, French press coffee with fresh steamed milk, strawberries grown in free trade soil that have been serenaded daily, Odwalla tangerine juice and Roederer mimosas. Also, fresh baked pastries. Oh god, I love California.
Preheat the oven to 350. You're going to need two skillets, and they need to be oven proof (use cast-iron, I freaking love cast-iron). Melt a bit of butter in a skillet and sautee your onions. After a couple of minutes, add the sliced shallots. When they start to get transparent and smell good, add your sliced potatoes and let them sit, spread them out, let them sit, rearrange them, etc, for a couple of minutes. Then cover them and put the whole skillet in the oven for 15 to 20 minutes, until the potatoes are tender (but not totally soft).
While the potatoes are in the oven, whisk your eggs, salt and pepper and add the cheese, mixing it in as thoroughly as possible. Don't worry if it's a little chunky, you just want the cheese to be evenly distributed. Coat the cast iron skillet with a bit of butter. When the potatoes and onions are done, take them out of the oven and transfer them to the cast iron pan. Move things around to be sure everything is evenly distributed. Sprinkle the chopped asparagus over everything, pour the egg/cheese stuff, sprinkle the green onions and finally give the whole shebang a sprinkle of salt and pepper. Cover and place in the oven for a half an hour, remove the cover and bake for another 10 minutes. Eat it while it's hot!
Friday, March 4, 2011
Egg Flower Soup
Last night I got home from work late. My stomach was raging, as was everything else. I got clipped by a biker on the way home! While walking on the sidewalk. Infuriating.
This is what I made for dinner to recover:
Egg Flower Soup
- 4 cups chicken stock
- 2 eggs, whisked
-Garlic Salt, crushed pepper flakes and ginger to taste
In a medium pot, bring your chicken stock to a boil. While it's heating, add garlic salt, crushed red peppers and ground ginger. I keep ginger root frozen in the fridge so I grated some in the soup as well. After the stock has come to a boil bring it back down to a simmer and, in a light and steady stream, pour the whisked eggs into the middle of the pot while stirring in a circular motion, slowly and steadily. Keep stirring slowly for a couple of minutes to make sure it's all cooked. Pour in a bowl and slurp, thanking whatever powers that may be for pajamas, indoor heating and grey's anatomy on netflix instant watch.
This is what I made for dinner to recover:
Egg Flower Soup
- 4 cups chicken stock
- 2 eggs, whisked
-Garlic Salt, crushed pepper flakes and ginger to taste
In a medium pot, bring your chicken stock to a boil. While it's heating, add garlic salt, crushed red peppers and ground ginger. I keep ginger root frozen in the fridge so I grated some in the soup as well. After the stock has come to a boil bring it back down to a simmer and, in a light and steady stream, pour the whisked eggs into the middle of the pot while stirring in a circular motion, slowly and steadily. Keep stirring slowly for a couple of minutes to make sure it's all cooked. Pour in a bowl and slurp, thanking whatever powers that may be for pajamas, indoor heating and grey's anatomy on netflix instant watch.
Thursday, January 20, 2011
The Weekend. No, not this weekend, last weekend.
I'm being inspired by certain other bloggers (ahem, Miss Lost-In-Wonderland) and comments on my own blog (ahem, M.) that I need to share my life more. It's true. Out of excitement for this upcoming weekend, allow me to share my epically awesome last weekend:
Friday: Work.Blegh. It came, it went. Post-work was an extra special ice skating outing to the sculpture garden with many choir friends and a couple other awesome friends.
 |
| Watching the boy try not to fall over while on the ice = hilarious. |
 |
| Literally skating backwards in circles around him = super mean, but also hilarious. This is an accurate portrayal of how I look ice skating, by the by. |
Here's a bit of information you may not have known - ice skating for two hours makes you hungry! Like, really hungry! We grabbed a bite to eat at this bar where you can pour your own beer from the tap. Being almost at the point of collapsing I bounced early and went home to my mercifully clean house (sooo worth staying up Thursday night to get it that way!) and dropped into my [heated!] bed to sleep the week off.
Saturday: I woke up feeling limber and stretchy, and really excited for a morning yoga class. I went to Yoga District up on Rhode Island and First for the first time with R, at her suggestion (and frequent nudging). It was really nice! First of all, they squeezed a lot of us in the room, and second, they only charge $10 for an hour and fifteen minute class. The instructor kind of looked like Barney Stinson in the episode where he tries to steal Ted's girl (you know, that episode). He was actually very soothing. My biceps were positively shaking afterward from all the vinyasa repetitions, and it was awesome. R and I went to Big Bear Cafe after class for brunch (does anyone else expect this when they go there?). SO tasty. They were out of bagels, and at first I was like, what the what!? but I ordered my lox and cream cheese on whole grain toast and it was SO good that next time I'm just ordering that. Also, not enough cafes serve their tea in a giant teapot. I liked that I didn't run out of tea in five minutes at Big Bear.
 |
| Bears. The gay kind. |
Saturday, continued: After a quick trip to Columbia Heights to go to Marshall's (sweet sweet Marshall's, how I love thee), I ran my butt home to change for Saturday part II: Roller Derby. You guys, I freaking love roller derby. I've been going since October and I'm pretty much obsessed. This time around I think I got more than 15 people to join me for the brawl. Scare Force One, you kick ass each and every time. Small Fry, Lenore Gore, I want your moves on the track. Martha Squashington, I want your name. I don't think it's too late to become a DC rollergirl, do you?
Oh, and PS, remember the halftime show? These kids were jumping rope in a troupe like nobody's business! It was flippin' fantastic.
 |
| Marion Barrycuda being badass (picture via dcist) |
Saturday night was a basic Wellesley gathering, lots of girls, a couple guys, plenty of fancy booze and eats. The yearbook came out - 'nuff said.
Sunday: I had to wake up at 7 am to meet D. and M. for a hike in Shenandoah. Ever hear of Old Rag? It's a hike that winds through the woods and up the side of a mountain for a few miles, then over a couple miles of rocky ridge at the top (requiring some rock scramble action) and back down again. It was fantastic, especially the rock scramble bit.
 |
| Slip canyon. Thankfully I didn't have to saw off my own arm to get out. |
I made it a condition of our hike that I get Cracker Barrel on the way home (haha, take that A. with your post-hiking Denny's!). Buttermilk fried chicken is a big win, btw. And biscuits, macaroni and cheese, fried okra, raspberry sweet tea and cornbread. I definitely did not have a hot fudge sundae for dessert either. It was delicious.
Monday: Sleep. Food. Sleep. Choir. Sleep.
On the schedule for this weekend: Baking brownies, choir concert, baking brownies, hopefully yoga again!, showing family around town, choir concert part the second, dinner with family, choir after-party, brunch with family, movies, rest, movies, food. Sleep. Sleeeeeeeeeep. Sleep.
Friday, January 14, 2011
Yogurt cake!
Another Joy the Baker recipe - thank you Joy! I especially love how many savory recipes she's been writing up as of late.
The reason I wanted to bake (well, ok, other than that I always want to bake) was the horrible mood I found myself in most of Wednesday and Thursday. You know that bratty, petulant feeling you get? And then, recognizing that you have no reason and no right to be so agitated, you just get angrier, consumed with guilt and bitterness that just grow on each other like a virus in a putrid petri dish? No? Well anyway, it was a bad mood. Cake makes me feel better, 100 % of the time. I particularly liked how I had to handle the ingredients - zesting a grapefruit, rubbing the zest into a bowl of sugar, stirring it all together with a spatula. It could be that I'm the worst case of reverse-feminine mystique in the history of ever - longing to get out of the office so I can just get back in the kitchen and do what I'm good at. And if the review of this cake around the office are any indication, I'm decently good at baking.
Yeesh, I should work on my baking documentation skills - this does not look so good!

The reason I wanted to bake (well, ok, other than that I always want to bake) was the horrible mood I found myself in most of Wednesday and Thursday. You know that bratty, petulant feeling you get? And then, recognizing that you have no reason and no right to be so agitated, you just get angrier, consumed with guilt and bitterness that just grow on each other like a virus in a putrid petri dish? No? Well anyway, it was a bad mood. Cake makes me feel better, 100 % of the time. I particularly liked how I had to handle the ingredients - zesting a grapefruit, rubbing the zest into a bowl of sugar, stirring it all together with a spatula. It could be that I'm the worst case of reverse-feminine mystique in the history of ever - longing to get out of the office so I can just get back in the kitchen and do what I'm good at. And if the review of this cake around the office are any indication, I'm decently good at baking.
Yeesh, I should work on my baking documentation skills - this does not look so good!

Grapefruit Yogurt Cake (via Joy the Baker)
2 cups flour
1 Tablespoon baking powder
1/4 teaspoon salt
2 eggs
3/4 cup sugar
1 cup yogurt
1/3 cup vegetable oil
1/2 cup grapefruit juice
zest of one grapefruit
vanilla extract
3 Tablespoons powdered sugar
First, preheat your oven to 350 degrees and butter and flour a 9- or 10-inch cake pan.
Zest one grapefruit and collect the zest in a large mixing bowl bowl. Add the sugar and pinch the zest into it until it is thoroughly incorporated and fragrant. Juice the grapefruit until you have 1/2 cup of grapefruit juice. Whisk the flour, baking powder and salt together in a medium bowl. In another medium bowl mix together the yogurt, vegetable oil, vanilla extract and one tablespoon of the grapefruit juice.
Crack the eggs into the large mixing bowl with the zesty sugar and mix the two on high until it is pale and creamy. Add the yogurt/veggie oil mixture and mix thoroughly. Add the flour mixture and mix on medium until just combined. Pour into the cake pan and smooth the top with the spatula. Place in the oven to bake for about 30-40 minutes (35 was good for mine, 33 would have been perfect). When the top is golden and cake pulls away from the sides of the pan it's done. Let the cake cool for 10 minutes in the pan, then remove and cool on a rack.
The glaze:
Mix the remaining grapefruit juice and 3 Tablespoons of powdered sugar in a small saucepan. Bring to a boil while stirring, then turn the stove down until the liquid is simmering, still stirring, for ten minutes. Puncture the top of the cake in several places (I used a thin paring knife, a skewer would work as well) and pour the glaze over the top of the cake. Joy recommended using a pastry brush to spread the glaze and I agree - I also used it to spread the glaze on the sides of the cake, which looked really pretty.
The last step is to serve it to your coworkers with a big smile and a "Happy Friday!" I promise it'll erase that angry-shrew feeling you've had the whole rest of the week.
Wednesday, January 12, 2011
French Sister Soup
The winter of 2011 is all about soup for me - all I think about, all I eat, all I want with a slice of crusty bread or a grilled cheese sandwich. It started with my sister who has been making "french soup" for the past few years. It's a Sunday night soup, it's a soup for when you're tired or you've been eating too much or you're feeling homesick. It's also really easy :)
Ingredients:
1 onion
2 leeks
3 carrots
2 potatoes
Chop the onion and add it to the soup pot with a little olive oil or butter (My sister says butter is better but it's up to you). Heat them on low - you don't want to caramelize or brown them, you just want to cook them until they're fragrant and translucent. Add the chopped leeks (slice them in half length-wise then chop them into roughly the same size pieces as the onion). Cook the leeks as you did the onions, on low heat until they are fragrant and translucent. If this is unclear, think of it this way: when the onions no longer smell like they could make you cry, they're probably good).
After the leeks are cooked add the peeled and chopped carrots and the chopped potatoes - side note: if you want to blend this soup (and you can, although I prefer to leave it chunky) you should peel the potatoes. Let them sit with the leeks and onions for a moment, then cover the whole mess with a. water, b. chicken broth or c. some combination of the two, based on your personal preferences. Let it cook, hot but not boiling, for about a half an hour, or until the potatoes are soft. Eat with a grilled cheese sandwich. Yum!
Ingredients:
1 onion
2 leeks
3 carrots
2 potatoes
Chop the onion and add it to the soup pot with a little olive oil or butter (My sister says butter is better but it's up to you). Heat them on low - you don't want to caramelize or brown them, you just want to cook them until they're fragrant and translucent. Add the chopped leeks (slice them in half length-wise then chop them into roughly the same size pieces as the onion). Cook the leeks as you did the onions, on low heat until they are fragrant and translucent. If this is unclear, think of it this way: when the onions no longer smell like they could make you cry, they're probably good).
After the leeks are cooked add the peeled and chopped carrots and the chopped potatoes - side note: if you want to blend this soup (and you can, although I prefer to leave it chunky) you should peel the potatoes. Let them sit with the leeks and onions for a moment, then cover the whole mess with a. water, b. chicken broth or c. some combination of the two, based on your personal preferences. Let it cook, hot but not boiling, for about a half an hour, or until the potatoes are soft. Eat with a grilled cheese sandwich. Yum!
Wednesday, October 6, 2010
Crazy Little Thing Called Bread
It's whole wheat, nutty and delicious. It's made with olive oil, honey and oatmeal. It's also a little, just a scotch, practically not at all...flat. Yes, you read right, my bread did not rise. Does that mean I'm giving up on it? Not on your life! What kind of self-respecting amateur baker and lover-of-all-things-baked would I be if I threw the dough out? No, right now it's sitting in the oven thinking about how tasty it's going to be for lunch tomorrow. I, myself, have learned a valuable lesson about making substitutions in a new recipe.
A couple months ago I went to New Jersey to celebrate my Grandpa's 90th birthday (hi Grandpa!), and while I was there enjoying my family (and the Cape May County Zoo - small but might) I learned that I had been offered a job in DC. With benefits! There was much joy and celebrating that week, and a little premature thanksgiving, and so when I hopped of the train at Dupont Circle I walked straight into Kramer Books and bought myself a cookbook I've been dying to have - Miss Dahl's Voluptuous Delights. Yes, that is seriously the title. This book is packed with delectable recipes and lovely photos of the food and Miss Sophie Dahl herself, in all her glory. She divides the book into seasons and meals, intermingled with stories of her childhood and young adult life. It's a book that really makes use of seasonal, whole vegetables. Part of my food philosophy (not my dessert philosophy) is to get delicious whole foods and do almost nothing to them - this book embraces that idea (grilled vegetables with halloumi cheese, cinnamon roast peaches with vanilla yogurt) , as well as urging me to get a little more creative (brown rice risotto with pumpkin, marscapone, sage and almonds, chicken stew with green olives). This book is, for the moment, all alone on my bookshelf, but it's so lovely that it needs no company at all.
One of the recipes that caught my today was Musician's Bread, an ostensibly quick and easy whole wheat recipe that only rises for 40 minutes (!!) and only cooks for an hour (!!). It's a perfect week night recipe if you're dying to bake (and with the weather turning colder, I'm absolutely dying to bake). Unfortunately, all did not go as perfectly as I had hoped it would. First of all, Safeway doesn't have instant yeast, rolled oats, or sunflower oil. I substituted: active dry yeast, steel-cut oatmeal and olive oil. I also added (hubris, my friends, hubris) sunflower and pumpkin seeds, because there is almost nothing I love better than whole wheat bread stuffed with nutty, protein-rich seeds. It is an extremely easy recipe, you don't have to let the yeast sit, you don't have to mix much. Just add the wet ingredients to the dry, and let it rise. Well, ladies and gents, the rising bit didn't happen. It's been sitting in the oven for an hour and ten minutes and I have no idea -- ok, now it's out of the oven. This blogging in real-time is fun, right? OK! The bread is heavy, really thick and a little gummy, but also rich, cooked through and delicious. This is really a peasant bread, the crust is thick and hearty. So delicious with raspberry jam! I'm looking forward to eating it for breakfast with peanut butter and honey, and for lunch with turkey, cheese, sprouts and mustard :)
Nutty, Chewy, Whole Wheat Bread
(Modified from Musician's bread found in Miss Dahl's Voluptuous Delights by Miss Sophie Dahl)
4 Cups Whole Wheat Flour
1 Cup Steel Cut Oats
1 Packet Active Dry Yeast
1 Tablespoon Sea Salt
1/3 to 1/2 Cups Sunflower and Pumpkin seeds
1 Tablespoon Honey
1 Tablespoon Olive Oil
2 1/2 Cups Warm Water
Oil a 9 by 5 inch loaf pan with olive oil.
In a medium bowl stir together the dry ingredients and the seeds. In a small bowl mix together the wet ingredients. Pour the wet into the dry and mix thoroughly with a wooden spoon until the flour has been all soaked up.
Place in a warm spot covered with a towel for 20 minutes, then mix thoroughly again with the wooden spoon. Preheat the oven to 375 degrees F. Drop the dough into the loaf pan and press gently into the corners (also with the spoon). Let it rest under the towel for another 20 minutes. Pop it into the oven for about an hour (but maybe more like an hour and 10, which is how long mine took), then dump it onto a cutting board and cover with a towel. Slice, slather with jam, eat. Repeat.

A couple months ago I went to New Jersey to celebrate my Grandpa's 90th birthday (hi Grandpa!), and while I was there enjoying my family (and the Cape May County Zoo - small but might) I learned that I had been offered a job in DC. With benefits! There was much joy and celebrating that week, and a little premature thanksgiving, and so when I hopped of the train at Dupont Circle I walked straight into Kramer Books and bought myself a cookbook I've been dying to have - Miss Dahl's Voluptuous Delights. Yes, that is seriously the title. This book is packed with delectable recipes and lovely photos of the food and Miss Sophie Dahl herself, in all her glory. She divides the book into seasons and meals, intermingled with stories of her childhood and young adult life. It's a book that really makes use of seasonal, whole vegetables. Part of my food philosophy (not my dessert philosophy) is to get delicious whole foods and do almost nothing to them - this book embraces that idea (grilled vegetables with halloumi cheese, cinnamon roast peaches with vanilla yogurt) , as well as urging me to get a little more creative (brown rice risotto with pumpkin, marscapone, sage and almonds, chicken stew with green olives). This book is, for the moment, all alone on my bookshelf, but it's so lovely that it needs no company at all.
One of the recipes that caught my today was Musician's Bread, an ostensibly quick and easy whole wheat recipe that only rises for 40 minutes (!!) and only cooks for an hour (!!). It's a perfect week night recipe if you're dying to bake (and with the weather turning colder, I'm absolutely dying to bake). Unfortunately, all did not go as perfectly as I had hoped it would. First of all, Safeway doesn't have instant yeast, rolled oats, or sunflower oil. I substituted: active dry yeast, steel-cut oatmeal and olive oil. I also added (hubris, my friends, hubris) sunflower and pumpkin seeds, because there is almost nothing I love better than whole wheat bread stuffed with nutty, protein-rich seeds. It is an extremely easy recipe, you don't have to let the yeast sit, you don't have to mix much. Just add the wet ingredients to the dry, and let it rise. Well, ladies and gents, the rising bit didn't happen. It's been sitting in the oven for an hour and ten minutes and I have no idea -- ok, now it's out of the oven. This blogging in real-time is fun, right? OK! The bread is heavy, really thick and a little gummy, but also rich, cooked through and delicious. This is really a peasant bread, the crust is thick and hearty. So delicious with raspberry jam! I'm looking forward to eating it for breakfast with peanut butter and honey, and for lunch with turkey, cheese, sprouts and mustard :)
Nutty, Chewy, Whole Wheat Bread
(Modified from Musician's bread found in Miss Dahl's Voluptuous Delights by Miss Sophie Dahl)
4 Cups Whole Wheat Flour
1 Cup Steel Cut Oats
1 Packet Active Dry Yeast
1 Tablespoon Sea Salt
1/3 to 1/2 Cups Sunflower and Pumpkin seeds
1 Tablespoon Honey
1 Tablespoon Olive Oil
2 1/2 Cups Warm Water
Oil a 9 by 5 inch loaf pan with olive oil.
In a medium bowl stir together the dry ingredients and the seeds. In a small bowl mix together the wet ingredients. Pour the wet into the dry and mix thoroughly with a wooden spoon until the flour has been all soaked up.
Place in a warm spot covered with a towel for 20 minutes, then mix thoroughly again with the wooden spoon. Preheat the oven to 375 degrees F. Drop the dough into the loaf pan and press gently into the corners (also with the spoon). Let it rest under the towel for another 20 minutes. Pop it into the oven for about an hour (but maybe more like an hour and 10, which is how long mine took), then dump it onto a cutting board and cover with a towel. Slice, slather with jam, eat. Repeat.

Chocolate Bread
A while back (last June? July?) I made this bread, from David Lebovitz at The Sweet Life in Paris, one of my favorite bloggers (and tweeters. Seriously, this guy is funny). It was another of my summer "firsts," which also included pie, and a layer cake. Those turned out pretty well, and so did this. Well...I have to be honest, this wasn't my favorite recipe. While I love chocolate (and I do love chocolate) this bread wasn't dense enough; it was too crumbly, and the crust wasn't substantial. It wasn't quite bread, and it wasn't quite cake...oh, and it wasn't very good after the first day. Maybe I did it wrong? Anyway, I ate it right out of the oven with my partner in crime (I'm looking at you M.C.!) and it positively crumbled into bits as I tried to slice it. Right out of the oven it was pretty divine (with a bit of butter....) but it didn't improve from there. I'm willing to believe this was my error though, as David Lebovitz is a fabulous baker and surely knows things I do not :)
Here's the recipe, straight from the horse's kitchen: http://www.davidlebovitz.com/2010/04/chocolate-bread-recipe/
And my version:


Here's the recipe, straight from the horse's kitchen: http://www.davidlebovitz.com/2010/04/chocolate-bread-recipe/
And my version:


Tuesday, September 28, 2010
Strawberry-Blueberry Liberty Bell mini-Pies
So waaaay a long time ago, in July, I made my first pie. I had a bit of leftover dough for the crust, so I decided to make festive little Fourth of July Liberty Bell Pielettes. Are they adorable!? I cut the little cracks into the bells myself. A little note though - the leftover pie dough has been handled (a lot) and can get a little tough. Still tasty? Yes.


Monday, August 2, 2010
Chocolate Chip Cookies
A while back I was getting bored with my old standby chocolate chip cookie recipe. It just seemed so boring. While poking around the interwebs I found this gem of an article from the New York Times, provocatively called Perfection? Hint: It's Warm and Has A Secret. I will be the first to admit that it's a little ridiculous (bittersweet chocolate feves? Yeah, I'll just get regular chips, thanks) and you do get the very intense and exact measuring (1 cup minus two tablespoons) and it's not like you're always planning cookies in advance (24 hours of chilling? come on!), but. BUT. These are seriously, above-and-beyond, mind-blowingly tasty cookies. The only problem I have is that I tend to overcook them just a bit, which is fine when they're right out of the oven and gooey, but not so good when you're trying to chomp on one the next day and it's like a Frisbee. The originally recipe called for cake flour and bread flour, which I choose to ignore. Cake flour creates a lighter crumb, bread flour a heavier crumb, so in equal parts they make all-purpose flour. The only real key to this recipe is simple: chill the batter for at least 24 hours. Trust me, it's worth it.
Chocolate Chip Cookies (Originally published in the New York Times, 9 July 2008)
In another bowl, cream the butter, brown sugar and white sugar together until they are light, fluffy and smooth. Add the eggs one by one, then the vanilla extract. Scrape down the sides of the bowl and mix the flour in in two parts, making sure not to over-mix. Add the chocolate chips, cover the bowl and put it in the fridge for at least 24 hours. I know you want to make them now, but resist that urge.
After you've waited the full 24 hours (I know it's hard, but do it anyway) preheat the oven to 350 degrees F. Form roughly golf-ball sized spheres of dough without touching them too much (you want them to still be cold when they get in the oven) and sprinkle a touch of sea salt on the top. Bake them in the oven for 18-20 minutes (feel this out on your own, it might take a couple tries to get the perfect time) and cool them for as long as you can stand. If you make it three seconds I will be impressed.
Step 3: DIG IN.
Chocolate Chip Cookies (Originally published in the New York Times, 9 July 2008)
- 2 cups minus 2 tablespoons
- 2 1/3 cups (8 1/2 ounces) flour
- 1 1/4 teaspoons baking soda
- 1 1/2 teaspoons baking powder
- 1 1/2 teaspoons coarse salt
- 2 1/2 sticks (1 1/4 cups) unsalted butter
- 1 1/4 cups (10 ounces) light brown sugar
- 1 cup plus 2 tablespoons (8 ounces) granulated sugar
- 2 large eggs
- 2 teaspoons natural vanilla extract
- Chocolate Chips
- Sea salt.
In another bowl, cream the butter, brown sugar and white sugar together until they are light, fluffy and smooth. Add the eggs one by one, then the vanilla extract. Scrape down the sides of the bowl and mix the flour in in two parts, making sure not to over-mix. Add the chocolate chips, cover the bowl and put it in the fridge for at least 24 hours. I know you want to make them now, but resist that urge.
After you've waited the full 24 hours (I know it's hard, but do it anyway) preheat the oven to 350 degrees F. Form roughly golf-ball sized spheres of dough without touching them too much (you want them to still be cold when they get in the oven) and sprinkle a touch of sea salt on the top. Bake them in the oven for 18-20 minutes (feel this out on your own, it might take a couple tries to get the perfect time) and cool them for as long as you can stand. If you make it three seconds I will be impressed.
Step 3: DIG IN.
Natural v. Dutch-Process Cocoa Powder/Baking Soda v. Baking Powder
This was originally going to be squeezed into another post, but I realize this information is crucial enough that it deserves its own. The differences between these substances can mean a lot when you're baking! It's important to understand what effect they will have on whatever you're cooking. If you are very adventurous you could start to write your own recipes using this information, but it's also important if you ever need to make a substitution.
First, natural v. dutch-process cocoa powder. This is interesting and may save you a baking snafu in the future. Sometimes you'll see a box of cocoa powder that says "dutch-process/ed" on it. What does this mean? Cocoa powder is made from pressing the majority of the cocoa butter out of chocolate liquor (pure chocolate). The cocoa butter is the high-fat component of chocolate, so when it is mostly eliminated you are left with a block which is then grated into a powder. This untreated powder has a natural acidity which can affect the taste and leavening of your baked good. It is a more red/brown color and will react with baking soda, causing your cake, cookie or whatever to rise (it can also interfere with other leavening agents, such as yeast). Dutch-processed cocoa powder is a more true brown color associated with chocolate. It has been treated with an alkali to neutralize the acidity, and should be used in recipes with baking powder. Dutch-processed cocoa will not cause a reaction and provides a deep chocolate taste even in delicate recipes (such as souffle!). Most European treats call for dutch-process, whereas good old fashioned American delights such as brownies can be made with natural cocoa. Be warned: if a recipe calls for one or the other, be sure you're using the right one! If you have natural cocoa powder and you need dutch-process: for every 3 Tablespoons of natural cocoa powder, add 1/8 teaspoon of baking soda (an alkali that will neutralize the acid). If you have dutch-process and you need natural: for every 3 Tablespoons of dutch-process add 1/8 teaspoon of cream of tartar (an acidic salt). A NOTE: this will work better going from natural to dutch-process than vice versa.
And now, baking soda v. baking powder. This is a little complicated. I've read a lot about it, but I don't fully understand all the differences, but I'll give a little general information that should give you an idea of what they will do in a recipe. Basically, baking soda and baking powder are both sodium bicarbonate, an acidic salt. They both act as leavening agents in a recipe, reacting with the other ingredients to create tiny air bubbles of carbon dioxide, which make your baked good rise and be light and fluffy. Baking soda is much stronger than baking powder, and is used in recipes with other acidic ingredients, such as vinegar, buttermilk, natural cocoa, or sour cream. If it is not exposed to another acid, the final product will have an odd, bitter taste. It reacts very quickly, so recipes that include baking soda should be put in the oven as soon as possible. Baking powder was designed to slow the reaction of the ingredients. In addition to sodium bicarbonate, baking powder includes one or more acidic salts (such as cream of tartar or sodium aluminum sulfate) and cornstarch. Most baking powders you will find in the grocery store are double-acting, meaning one of the acids will react immediately when added to liquid and the other when it is exposed to heat in the oven. The double-acting powder makes the leavening more reliable, as time is no longer as pressing a factor. Theoretically if you got your hands on single-acting baking powder you would have to put the batter in the oven asap. Again, if you are baking it is important to try to follow the ingredients exactly! If you can't, here is the substitution: if you have baking soda and need baking powder: for 1 teaspoon of baking powder, mix 1/4 teaspoon baking soda, 1/2 teaspoon cream of tartar and 1/4 teaspoon of cornstarch. If you have baking powder and need baking soda, it's really not ideal! You will have to triple the amount of baking powder the recipe calls for (1 teaspon --> 3 teaspoons) and it will effect the taste, and potentially other things.
First, natural v. dutch-process cocoa powder. This is interesting and may save you a baking snafu in the future. Sometimes you'll see a box of cocoa powder that says "dutch-process/ed" on it. What does this mean? Cocoa powder is made from pressing the majority of the cocoa butter out of chocolate liquor (pure chocolate). The cocoa butter is the high-fat component of chocolate, so when it is mostly eliminated you are left with a block which is then grated into a powder. This untreated powder has a natural acidity which can affect the taste and leavening of your baked good. It is a more red/brown color and will react with baking soda, causing your cake, cookie or whatever to rise (it can also interfere with other leavening agents, such as yeast). Dutch-processed cocoa powder is a more true brown color associated with chocolate. It has been treated with an alkali to neutralize the acidity, and should be used in recipes with baking powder. Dutch-processed cocoa will not cause a reaction and provides a deep chocolate taste even in delicate recipes (such as souffle!). Most European treats call for dutch-process, whereas good old fashioned American delights such as brownies can be made with natural cocoa. Be warned: if a recipe calls for one or the other, be sure you're using the right one! If you have natural cocoa powder and you need dutch-process: for every 3 Tablespoons of natural cocoa powder, add 1/8 teaspoon of baking soda (an alkali that will neutralize the acid). If you have dutch-process and you need natural: for every 3 Tablespoons of dutch-process add 1/8 teaspoon of cream of tartar (an acidic salt). A NOTE: this will work better going from natural to dutch-process than vice versa.
And now, baking soda v. baking powder. This is a little complicated. I've read a lot about it, but I don't fully understand all the differences, but I'll give a little general information that should give you an idea of what they will do in a recipe. Basically, baking soda and baking powder are both sodium bicarbonate, an acidic salt. They both act as leavening agents in a recipe, reacting with the other ingredients to create tiny air bubbles of carbon dioxide, which make your baked good rise and be light and fluffy. Baking soda is much stronger than baking powder, and is used in recipes with other acidic ingredients, such as vinegar, buttermilk, natural cocoa, or sour cream. If it is not exposed to another acid, the final product will have an odd, bitter taste. It reacts very quickly, so recipes that include baking soda should be put in the oven as soon as possible. Baking powder was designed to slow the reaction of the ingredients. In addition to sodium bicarbonate, baking powder includes one or more acidic salts (such as cream of tartar or sodium aluminum sulfate) and cornstarch. Most baking powders you will find in the grocery store are double-acting, meaning one of the acids will react immediately when added to liquid and the other when it is exposed to heat in the oven. The double-acting powder makes the leavening more reliable, as time is no longer as pressing a factor. Theoretically if you got your hands on single-acting baking powder you would have to put the batter in the oven asap. Again, if you are baking it is important to try to follow the ingredients exactly! If you can't, here is the substitution: if you have baking soda and need baking powder: for 1 teaspoon of baking powder, mix 1/4 teaspoon baking soda, 1/2 teaspoon cream of tartar and 1/4 teaspoon of cornstarch. If you have baking powder and need baking soda, it's really not ideal! You will have to triple the amount of baking powder the recipe calls for (1 teaspon --> 3 teaspoons) and it will effect the taste, and potentially other things.
Thursday, July 1, 2010
It's a warm, buttery Summer
A couple weeks ago I wanted buttermilk biscuits. Why? I don't remember. Besides, since when do my food cravings have to be tied to rational thought? It's a well known fact that everything makes me hungry, including and especially the phrase "I wish I were hungry." Good thing I just ate lunch. Now where were we?
Ah yes, Buttermilk Biscuits. This recipe is courtesy Joy the Baker. I could say things about it, but I won't. Just make them. You will understand.
Buttermilk Biscuits
(slightly modified from Joy the Baker, posted March 26, 2009)
Arrange the biscuits on a cookie sheet and bake them for 12 - 15 minutes, until they are slightly golden and fluffy. Enjoy with jam, butter, or anything else you fancy (I've heard mustard and ham is good).


Ah yes, Buttermilk Biscuits. This recipe is courtesy Joy the Baker. I could say things about it, but I won't. Just make them. You will understand.
Buttermilk Biscuits
(slightly modified from Joy the Baker, posted March 26, 2009)
- 3 cups all-purpose flour
- 4 1/2 teaspoons baking powder
- 3/4 teaspoon cream of tartar
- 3/4 teaspoon salt
- 3/4 cup butter, cold and cut into cubes
- 1 egg, beaten
- 3/4 cup buttermilk, cold
Arrange the biscuits on a cookie sheet and bake them for 12 - 15 minutes, until they are slightly golden and fluffy. Enjoy with jam, butter, or anything else you fancy (I've heard mustard and ham is good).


A Very Merry Un-Birthday to You!
Last week was my birthday! I spent a wonderful, lovely, quiet day baking my extravagant birthday cake. The best birthday present I could have asked for was flying back to California the day before. See, I never did get a work permit in Switzerland. After three months I had to leave, and now I'm on the hunt for a new job in a new city. Don't we all dream about what we would do if? It's as if someone has freed me from every responsibility or concern and said "Martha, go out there and make your life look exactly the way you want." I had a glorious moment contemplating my wildest dreams as potential realities, discovering that my wildest dreams really aren't very wild at all. Problem?
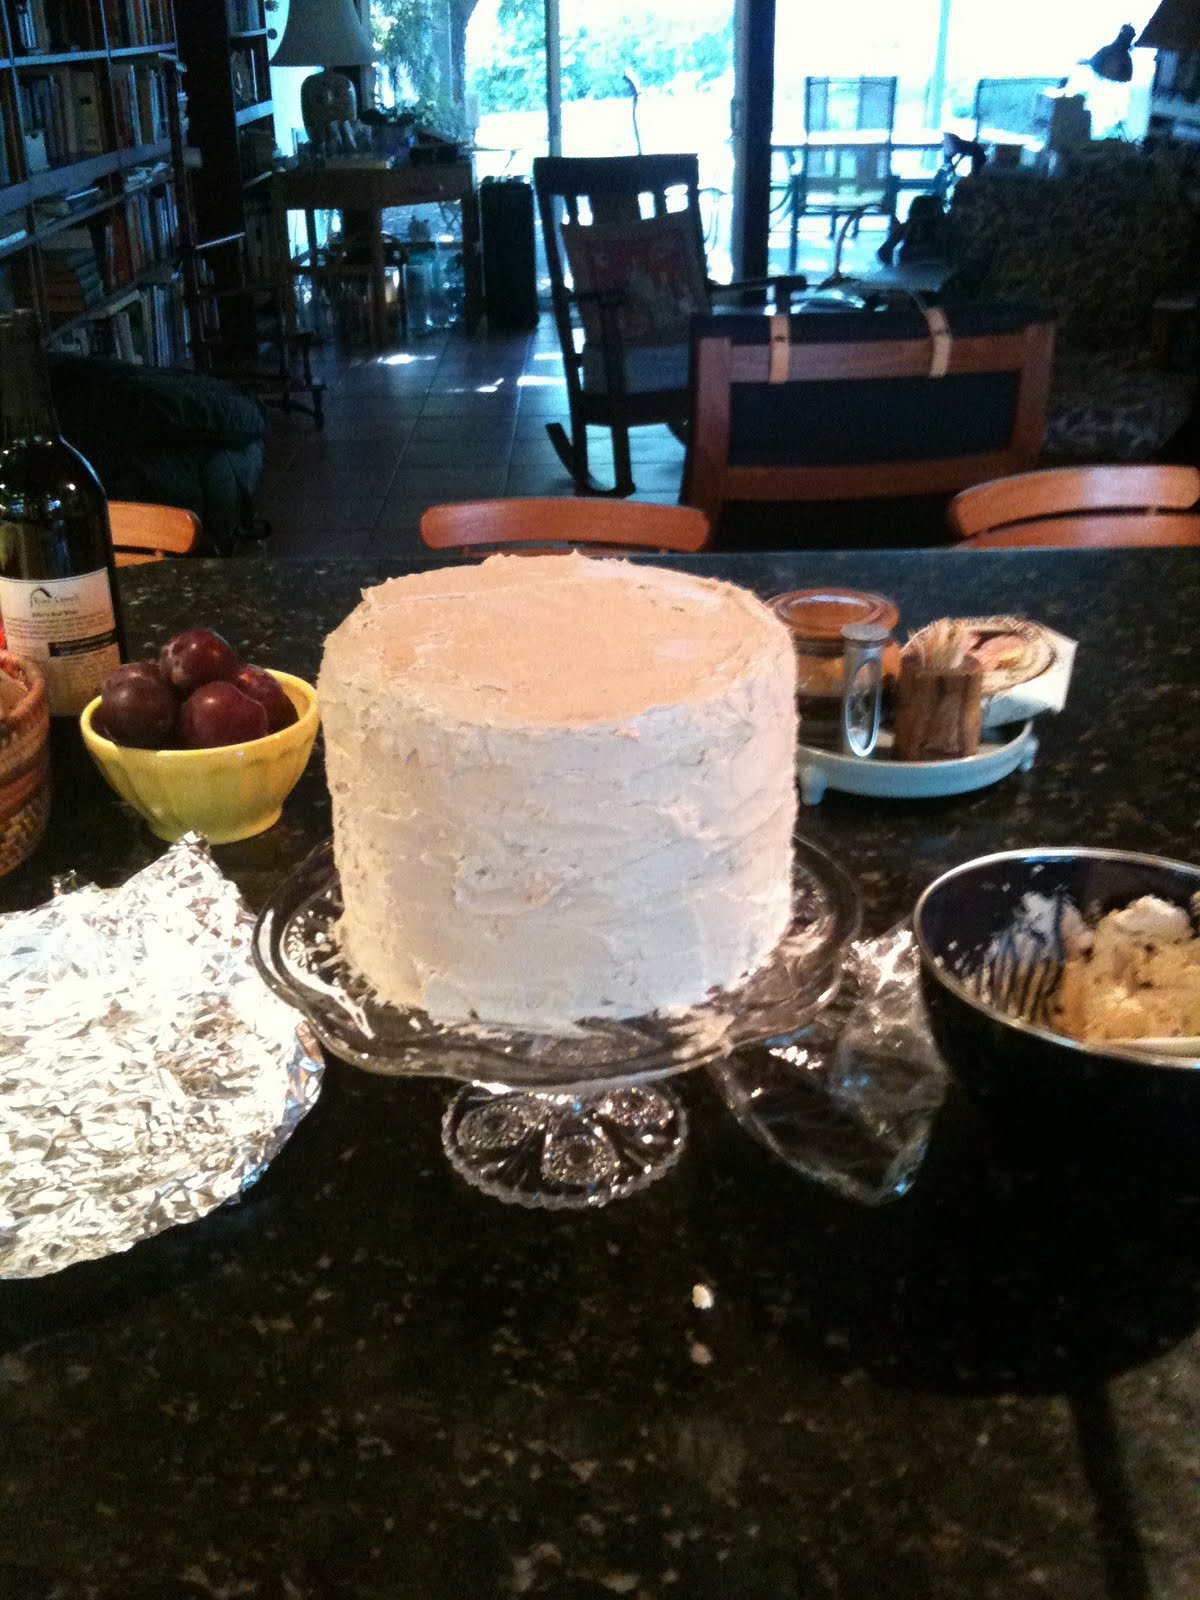
If you could have or be or do anything you want, what would it be? Last week this cake was all I could want out of life:

 It's dreamily called Buttermilk Yellow cake with Brown Sugar Buttercream Frosting. Shall we rename it? How about Heavenly Cake, Scrumptious Cake, or Brown Sugar Dream Cake? Any ideas? The reason I chose this cake is because a) we had a bit of extra buttermilk in the fridge and buttermilk makes everything taste better and b) how good does brown sugar buttercream sound? I mean really now. I thought it would be a bit more tan, but as it turns out the egg whites really dominate this frosting. My only modification would be to add a little less salt to the frosting. On the other hand it gives it this intriguing salty-sweet caramel taste and prevents the whole cake from being too sweet.
As you can see the cake was almost purely white, which meant that after being assembled and frosted it looked like a wedding cake. To tell you the truth I hadn't thought past the baking stage so I really had nothing in mind for the decoration. Fortunately my sister and mom gave my dad a bunch of French lavender plants for the garden, which are beautifully in bloom right at this very moment. It only took a few minutes to pluck a few stems and arrange them artfully on the cake! (side note: it may still have looked like a fancy wedding cake. I do not care.)
Let's get into how I made it...and I want to remind you that it took all day. Still, you should try it sometime, there's nothing more satisfying than a perfectly iced three-layer cake.
Buttermilk Yellow Cake
(originally Moist Yellow Cake published in Bon Appetit, August 2004)
I had to make my own cake flour this time because I ran out...Fortunately making cake flour is quite easy! You will need cornstarch and all-purpose flour. For every cup of flour take out two tablespoons. Replace the two tablespoons of flour you took out with two tablespoons of cornstarch. For three cups of cake flour, you would take out six tablespoons of flour and replace them with six tablespoons of cornstarch. Sift the mixture together about five or six times and you're ready to go.
After you've made your cake flour add in the baking powder and salt and sift it together again. Sifting will keep the flour very light and will allow the wet ingredients to permeate better. It will also lighten the crumb and prevent the cake from getting too heavy.
Spend a little time with the mixer on medium high creaming the butter. It should be fluffy and light-colored after a couple minutes. Now you want to add the sugar a quarter cup at a time continuing to beat the butter. This will allow the sugar crystals to break through the butter fat, keeping the cake light. One by one add the eggs, beating well after each one.
Mix the vanilla extract with the buttermilk. Now you're ready to mix it all together! Start with the flour, mixing in three parts, alternating with the buttermilk and ending with the flour. It's very important that you not over mix! Keep the mixer on medium speed and mix only until the ingredients are combined. After you've added everything scrape down the sides of the bowl and mix briefly.
Add the batter to the pans, filling each equally and smoothing the tops (this will help the cake avoid doming). Place in the center of the oven and cook until the top is golden and it starts to pull away from the side of the pan (about 35 minutes for me with three pans). A knife in the center should come out clean. Don't worry if they get a teensy bit overcooked, as it will actually make it easier to assemble and frost.
Now that the cake is in the oven, let's move on to the hard part!
Brown Sugar Buttercream
(originally seen in Gourmet, January 2001)
First things first. Add the salt to your room temp egg whites. The salt will help make sure the whites fluff enough, but it will also make the frosting a wee bit salty, not in a gross way but noticeably. I would add only half a teaspoon next time, and see what happens. Once your egg whites and salt are combined (in a very clean, dry, room temperature stainless steel or copper bowl) set them aside.
Take out a small saucepan and mix the brown sugar and water in it. Put them over the stove on medium high and bring to a boil. Make sure it doesn't burn by stirring occasionally. While it's boiling, occasionally brush down the sides of the pan with a pastry brush soaked in water. Right when the simple syrup starts to boil, start mixing your egg whites. Once they get to a frothy stage, add the lemon juice and continue beat until it forms soft peaks.
I didn't have a candy thermometer so I used a meat thermometer, but you want to let the sugar boil until it gets to about 240 degrees F. Just eye-balling it I would say this is the point where there are lots of bubbles coming up and it looks a little frothy. As soon as it reaches this point, pour it out into a heat-proof container.
Now you are going to slowly add the simple syrup to the egg whites while beating with a mixer. In a slow, thin stream add the syrup to one side of the bowl, beating at a high speed. Continue beating the egg whites for 6 minutes, scraping down the pan. It should be cool to the touch when you are done. It should also be shiny and look really pretty and fancy.
Now you need your butter. It's in pieces (about 1-inch should do the trick) and it's softened (but not melty). Adding one piece at a time, mix the butter into the meringue. Make sure each piece is thoroughly mixed in before adding another. This part is a little freaky, because your formerly pretty meringue is going to start looking a little icky and curdled. That's ok! It will come together again (I promise). If it starts to get too soupy (mine did) place the bowl in some ice water for a few minutes. By the time you've added all the butter the buttercream should have come together again and look like fluffy yummy frosting. Don't forget to add the vanilla at the very end. Nicely done!
Assembling the layers
You didn't forget the cake in the oven, did you? The cake should be out of the oven and cooling on a rack. When it's about room temperature take a bread knife and smooth out the top of it a bit, if it's domed. Don't worry about making it too perfect, the frosting should be able to help you out. After it's smoothed out and completely cooled, wrap each layer in saran wrap and tinfoil, and place it in the fridge for an hour or so. Trust me, it'll help you frost.
Make sure the frosting is room temperature and don't chill it, or it will make it more difficult to spread. Now let's assume the layers are cool and you're all ready to assemble the cake. Start off by putting the first layer down on the cake plate. A helpful tip I once read said to smear a little frosting underneath it so it doesn't scoot around too much. now you want to layer a thick amount of the buttercream on the top of the cake, ignoring the sides. Place layer two upside-down on layer one. If the frosting layer is thick enough, you can press the cake down where it's uneven to straighten it out. Repeat the same thing with layer three, placing it upside-down on layer two and generously frosting the top. Now you're gonna move on to frosting the sides of the cake. This is a little tricky but you can do it! Take a spatula with a flat edge and start spreading the frosting on pretty thick. The first round will look globby and kinda bad. That's ok! After you have plenty of frosting on the side of the cake, clean the spatula off and start smoothing it down. Try to use long strokes, going around the cake and not pressing down too much. Clean off the spatula frequently. When the sides look smooth you can smooth off the top. Here are a few photos (also proof that I did not buy this cake as some suggested!):


If you could have or be or do anything you want, what would it be? Last week this cake was all I could want out of life:


As you can see the cake was almost purely white, which meant that after being assembled and frosted it looked like a wedding cake. To tell you the truth I hadn't thought past the baking stage so I really had nothing in mind for the decoration. Fortunately my sister and mom gave my dad a bunch of French lavender plants for the garden, which are beautifully in bloom right at this very moment. It only took a few minutes to pluck a few stems and arrange them artfully on the cake! (side note: it may still have looked like a fancy wedding cake. I do not care.)
Let's get into how I made it...and I want to remind you that it took all day. Still, you should try it sometime, there's nothing more satisfying than a perfectly iced three-layer cake.
Buttermilk Yellow Cake
(originally Moist Yellow Cake published in Bon Appetit, August 2004)
- 3 cups cake flour
- 1 Tablespoon baking powder
- 1/2 teaspoon salt
- 1 cup (two sticks) unsalted butter, room temperature
- 2 cups granulated sugar
- 5 large eggs
- 2 teaspoon vanilla extract
- 1 1/4 cups buttermilk
I had to make my own cake flour this time because I ran out...Fortunately making cake flour is quite easy! You will need cornstarch and all-purpose flour. For every cup of flour take out two tablespoons. Replace the two tablespoons of flour you took out with two tablespoons of cornstarch. For three cups of cake flour, you would take out six tablespoons of flour and replace them with six tablespoons of cornstarch. Sift the mixture together about five or six times and you're ready to go.
After you've made your cake flour add in the baking powder and salt and sift it together again. Sifting will keep the flour very light and will allow the wet ingredients to permeate better. It will also lighten the crumb and prevent the cake from getting too heavy.
Spend a little time with the mixer on medium high creaming the butter. It should be fluffy and light-colored after a couple minutes. Now you want to add the sugar a quarter cup at a time continuing to beat the butter. This will allow the sugar crystals to break through the butter fat, keeping the cake light. One by one add the eggs, beating well after each one.
Mix the vanilla extract with the buttermilk. Now you're ready to mix it all together! Start with the flour, mixing in three parts, alternating with the buttermilk and ending with the flour. It's very important that you not over mix! Keep the mixer on medium speed and mix only until the ingredients are combined. After you've added everything scrape down the sides of the bowl and mix briefly.
Add the batter to the pans, filling each equally and smoothing the tops (this will help the cake avoid doming). Place in the center of the oven and cook until the top is golden and it starts to pull away from the side of the pan (about 35 minutes for me with three pans). A knife in the center should come out clean. Don't worry if they get a teensy bit overcooked, as it will actually make it easier to assemble and frost.
Now that the cake is in the oven, let's move on to the hard part!
Brown Sugar Buttercream
(originally seen in Gourmet, January 2001)
- 3 large egg whites at room temperature
- 3/4 teaspoon salt
- 1 cup packed dark brown sugar
- 1/2 cup water
- 1/2 teaspoon fresh lemon juice
- 3 sticks (1 1/2 cups) unsalted butter, cut into pieces and softened
- 2 teaspoons vanilla extract
- Special equipment: candy thermometer
First things first. Add the salt to your room temp egg whites. The salt will help make sure the whites fluff enough, but it will also make the frosting a wee bit salty, not in a gross way but noticeably. I would add only half a teaspoon next time, and see what happens. Once your egg whites and salt are combined (in a very clean, dry, room temperature stainless steel or copper bowl) set them aside.
Take out a small saucepan and mix the brown sugar and water in it. Put them over the stove on medium high and bring to a boil. Make sure it doesn't burn by stirring occasionally. While it's boiling, occasionally brush down the sides of the pan with a pastry brush soaked in water. Right when the simple syrup starts to boil, start mixing your egg whites. Once they get to a frothy stage, add the lemon juice and continue beat until it forms soft peaks.
I didn't have a candy thermometer so I used a meat thermometer, but you want to let the sugar boil until it gets to about 240 degrees F. Just eye-balling it I would say this is the point where there are lots of bubbles coming up and it looks a little frothy. As soon as it reaches this point, pour it out into a heat-proof container.
Now you are going to slowly add the simple syrup to the egg whites while beating with a mixer. In a slow, thin stream add the syrup to one side of the bowl, beating at a high speed. Continue beating the egg whites for 6 minutes, scraping down the pan. It should be cool to the touch when you are done. It should also be shiny and look really pretty and fancy.
Now you need your butter. It's in pieces (about 1-inch should do the trick) and it's softened (but not melty). Adding one piece at a time, mix the butter into the meringue. Make sure each piece is thoroughly mixed in before adding another. This part is a little freaky, because your formerly pretty meringue is going to start looking a little icky and curdled. That's ok! It will come together again (I promise). If it starts to get too soupy (mine did) place the bowl in some ice water for a few minutes. By the time you've added all the butter the buttercream should have come together again and look like fluffy yummy frosting. Don't forget to add the vanilla at the very end. Nicely done!
Assembling the layers
You didn't forget the cake in the oven, did you? The cake should be out of the oven and cooling on a rack. When it's about room temperature take a bread knife and smooth out the top of it a bit, if it's domed. Don't worry about making it too perfect, the frosting should be able to help you out. After it's smoothed out and completely cooled, wrap each layer in saran wrap and tinfoil, and place it in the fridge for an hour or so. Trust me, it'll help you frost.
Make sure the frosting is room temperature and don't chill it, or it will make it more difficult to spread. Now let's assume the layers are cool and you're all ready to assemble the cake. Start off by putting the first layer down on the cake plate. A helpful tip I once read said to smear a little frosting underneath it so it doesn't scoot around too much. now you want to layer a thick amount of the buttercream on the top of the cake, ignoring the sides. Place layer two upside-down on layer one. If the frosting layer is thick enough, you can press the cake down where it's uneven to straighten it out. Repeat the same thing with layer three, placing it upside-down on layer two and generously frosting the top. Now you're gonna move on to frosting the sides of the cake. This is a little tricky but you can do it! Take a spatula with a flat edge and start spreading the frosting on pretty thick. The first round will look globby and kinda bad. That's ok! After you have plenty of frosting on the side of the cake, clean the spatula off and start smoothing it down. Try to use long strokes, going around the cake and not pressing down too much. Clean off the spatula frequently. When the sides look smooth you can smooth off the top. Here are a few photos (also proof that I did not buy this cake as some suggested!):



Monday, May 10, 2010
Asparagus, Pancetta, Shallots and Feta Pasta
Yesterday I made the most delicious pasta in the history of my pasta making. Seriously, Laura (S.) remember that bacon tomato pasta sauce? Yeah, this is better.
Let's jump right in, shall we? This is easy enough that anyone who likes pasta and has a half an hour should try it out. You can use this pasta cooking technique for almost any combination of vegetable and cheese that you like, and if you're a vegetarian you can, of course, forgo the pancetta.
Ingredients: Olive oil, salt, pepper, pancetta, chicken broth, pasta, asparagus, shallots, feta cheese
Get out a medium pot, or any kind of pan with high-ish sides. Whatever vegetable you want to add should be cooked and cut into pieces roughly similar to the size of the pasta you have chosen. This dish works best with pasta like penne, rigatoni, farfalle or rotini. You're going to start by crisping up your chopped pancetta in the bottom of the pan (the pieces should be not too big, not too small). Keep the stove between medium and high, you shouldn't need to adjust the heat at all throughout the recipe. Once the pancetta is crisped and browned take it out of the pan and set it aside (you'll be using it soon enough). Make sure you don't pour it out, because you want that yummy fat in the pan to brown your shallots.
The shallots should be sliced thin before you toss them in the pan. Stir and flip them around so they get nicely covered in the fat, and if you've added it, the olive oil. You don't want them to get too brown to fast, so if they start to get to hot pull the pan of the burner and shake them around a bit. To get it right you can pull it off the burner and put it back as much as you'd like. After a couple of minutes they should have softened and will start to look cooked. At this point you should put the pasta in the pan with the shallots, stirring and tossing for a minute until they are slightly toasted and covered in oil/fat. Yum.
Add chicken broth to the pan until the pasta is just covered. This should be enough that after the broth has been absorbed, the pasta will be cooked through (but not overdone). Make sure you stir it frequently so the pasta cooks evenly.
While the pasta is cooking, and in between stirring, you chop up the feta cheese. When the pasta is almost done, add the asparagus and mix it in. When the liquid is almost completely gone and the pasta is cooked, pour it into the dish in which you'll be serving, topping it with the feta and pancetta from earlier. Don't salt it too much, the cheese and pancetta should give it plenty of flavor already.
Then you're ready to eat! Doesn't cooking it this way make up a nice sauce for the pasta? Really rich and tasty. Next time I might add some lemon juice to the chicken broth, and top it with zest afterward. I think the original recipe called for that but I was too lazy to zest a lemon last night.
Let's jump right in, shall we? This is easy enough that anyone who likes pasta and has a half an hour should try it out. You can use this pasta cooking technique for almost any combination of vegetable and cheese that you like, and if you're a vegetarian you can, of course, forgo the pancetta.
Ingredients: Olive oil, salt, pepper, pancetta, chicken broth, pasta, asparagus, shallots, feta cheese
Get out a medium pot, or any kind of pan with high-ish sides. Whatever vegetable you want to add should be cooked and cut into pieces roughly similar to the size of the pasta you have chosen. This dish works best with pasta like penne, rigatoni, farfalle or rotini. You're going to start by crisping up your chopped pancetta in the bottom of the pan (the pieces should be not too big, not too small). Keep the stove between medium and high, you shouldn't need to adjust the heat at all throughout the recipe. Once the pancetta is crisped and browned take it out of the pan and set it aside (you'll be using it soon enough). Make sure you don't pour it out, because you want that yummy fat in the pan to brown your shallots.
The shallots should be sliced thin before you toss them in the pan. Stir and flip them around so they get nicely covered in the fat, and if you've added it, the olive oil. You don't want them to get too brown to fast, so if they start to get to hot pull the pan of the burner and shake them around a bit. To get it right you can pull it off the burner and put it back as much as you'd like. After a couple of minutes they should have softened and will start to look cooked. At this point you should put the pasta in the pan with the shallots, stirring and tossing for a minute until they are slightly toasted and covered in oil/fat. Yum.
Add chicken broth to the pan until the pasta is just covered. This should be enough that after the broth has been absorbed, the pasta will be cooked through (but not overdone). Make sure you stir it frequently so the pasta cooks evenly.
While the pasta is cooking, and in between stirring, you chop up the feta cheese. When the pasta is almost done, add the asparagus and mix it in. When the liquid is almost completely gone and the pasta is cooked, pour it into the dish in which you'll be serving, topping it with the feta and pancetta from earlier. Don't salt it too much, the cheese and pancetta should give it plenty of flavor already.
Then you're ready to eat! Doesn't cooking it this way make up a nice sauce for the pasta? Really rich and tasty. Next time I might add some lemon juice to the chicken broth, and top it with zest afterward. I think the original recipe called for that but I was too lazy to zest a lemon last night.
Wednesday, April 28, 2010
Strawberry-Rhubarb Compote
I'm getting the jump on things, it's not quite Strawberry-Rhubarb season. Not quite, but good enough to get started. I've been homesick lately and this is something my mom taught me to make. You can do it in any quantity, just grab some rhubarb and a box of strawberries and get going! Don't forget to buy greek yogurt or ricotta to eat with it.
Start by cleaning of your rhubarb. Isn't it funny looking? Like giant red celery! Slice the ends of with a sharp serrated knife, then start cutting the stalks on the diagonal into small chunks about an inch long. Try to make them even, and don't use the very end if it is completely green. Dump the rhubarb chunks in a pot and cover with some sugar. Toss them around a little to get them coated, and set them aside. Clean the strawberries and slice them, adding them to the pot. Once everything is sliced and in the pot, toss it around a bit to get it all coated. A note: if you're making the compote with strawberries you don't need that much sugar. In fact a variation on this recipe would be to squeeze and orange over the fruit instead.
Let the fruit sit for a half an hour, until the chunks have released some moisture in the pot.
Once there is a a bit of liquid in the bottom of the pot, place it on the burner and heat it up. You want to get the liquid bubbling but pay very close attention that it doesn't burn! Stir it frequently. Once the liquid has bubbled a bit, turn it down to medium low, stirring often and making sure it doesn't get too hot. In a half an hour or less, all the fruit should be melted down into a delightful looking compote. Taste it to see if it needs more sugar. When you're satisfied, take it off the stove and pour it into another bowl. Enjoy with yogurt, ice cream or by itself!
Start by cleaning of your rhubarb. Isn't it funny looking? Like giant red celery! Slice the ends of with a sharp serrated knife, then start cutting the stalks on the diagonal into small chunks about an inch long. Try to make them even, and don't use the very end if it is completely green. Dump the rhubarb chunks in a pot and cover with some sugar. Toss them around a little to get them coated, and set them aside. Clean the strawberries and slice them, adding them to the pot. Once everything is sliced and in the pot, toss it around a bit to get it all coated. A note: if you're making the compote with strawberries you don't need that much sugar. In fact a variation on this recipe would be to squeeze and orange over the fruit instead.
Let the fruit sit for a half an hour, until the chunks have released some moisture in the pot.
Once there is a a bit of liquid in the bottom of the pot, place it on the burner and heat it up. You want to get the liquid bubbling but pay very close attention that it doesn't burn! Stir it frequently. Once the liquid has bubbled a bit, turn it down to medium low, stirring often and making sure it doesn't get too hot. In a half an hour or less, all the fruit should be melted down into a delightful looking compote. Taste it to see if it needs more sugar. When you're satisfied, take it off the stove and pour it into another bowl. Enjoy with yogurt, ice cream or by itself!
Red Velvet Cake in France
Finally I get around to telling you about the red velvet cake I made for my sister's birthday. Here's a picture:

As you can see it was made in the shape of a giant cupcake. I hate baking in this pan, you can never get the cake perfect. It's always a little overcooked. But you'll probably bake in a normal pan, right? Good plan. My sister loves cupcakes and cute pans, and she loves red velvet cake. The recipe was beautiful, as I said before we made a couple substitutions, as you can see below. Try it out, it's a fabulous and tasty recipe that will most likely turn out beautifully!

Red Velvet Cake with Fluffy White Frosting and Toasted Coconut
Adapted from Joy the baker, from The Hummingbird Bakery Cookbook
makes 2 8-inch or 9-inch round cakes
8 Tablespoons unsalted butter, at room temperature
1 1/2 cup sugar
2 egg
5 Tablespoons unsweetened cocoa powder
4 Tablespoons of liquid, either half coffee and half water, or half food coloring and half water
1 teaspoon vanilla extract (or one package of vanilla sugar)
1 cup buttermilk (or 3/4 cup plain yogurt and 1/4 cup milk)
2 1/4 cups all-purpose flour
1 teaspoon salt
1 teaspoon baking soda (or one package of leavening)
3 teaspoons distilled white vinegar
Preheat oven to 350 degrees F (175 C). Grease and flour two 8-inch or 9-inch round cake pans. Set aside.
Cream the butter and sugar until light and fluffy, about three minutes. Turn mixer to high and add the eggs. Mix very well
In a separate bowl mix together cocoa, vanilla and red food coloring (or coffee & water) to make a thick paste. Add it to the butter/sugar and mix it very thoroughly (this is especially important if you're using the food coloring - get all the batter red!
Turn mixer to low and slowly add half of the buttermilk. Add half of the flour and salt and mix until combined. Scrape the bowl and repeat the process with the remaining milk and flour. Beat on high until smooth.
Turn mixer to low and add baking soda and white vinegar (we weren't sure if we should add them in the same place at the same time, so we put the baking soda on one side of the bowl and the vinegar on the other. It probably makes no difference whatsoever). Turn to high and beat a few more minutes.
Spoon batter into prepared cake pans and bake for 25-35 minutes or until a skewer inserted into the center cupcake comes out clean. It took our cake a looooong time to bake (over an hour) because of the mold it was in. I don't recommend it, the giant cupcake tends to overcook on the outside (although the inside was perfect).
Let rest in the pan for 20 minutes, then invert onto a cooling rack to cool completely before frosting.
Cream Cheese Frosting
We didn't have cream cheese, so we used weird French cheese spread. I didn't know what proportions to use but it basically goes like this: Butter, cream cheese and powdered sugar. Mix it until you get the right consistency... Better yet, go to Joy's website and get one of her recipes!
Tips for frosting your cake: this is not easy. I'm not good at it...that being said, here are some tips that I've heard. Make sure the frosting isn't too cold, or it will be harder to spread. The cake should be at room-temperature or cooler at this point. Don't do it when it's right out of the oven! If you need to make a layer cake, make sure the tops of the layers are fairly even so they will sit flat when stacked. Start by putting a layer of frosting on the first cake layer, then placing the second layer upside down on top. Lightly press it down if it's uneven in certain areas. Now you're going to put the "crumb layer" of frosting on top. This is a thin layer of frosting that will be harder to spread and not look as nice. Frost the top first, then the sides. Put the cake in the fridge for a while and let the frosting set. After an hour or so, take the cake back out and put a much thicker layer of frosting on it, top first, then the sides. Let that set in the fridge for a while. Then you're ready to serve it!
Sunday, April 25, 2010
The Last Two Weeks in Three Paragraphs (sorta)
Hi Everyone!
It's been a while...here's what's happened in the last two weeks:
1. Big meetings at work
2. Dad came to Switzerland
3. Dad and I went to Italy for a few days with a friend, they both got stuck for an extra four days because of a certain temperamental Icelandic volcano named Eyjafjallajokull. Yeah, you read right.
4. My friend Jon came to visit Lugano from Paris
5. Eating. Eating. Eating. Eating. Eating. Food. Eating.
Few! What have I baked since then? Well, for Dad a flour-less dark chocolate cake with brandied cherries and whipped cream, and after I got back, strawberry-rhubarb compote, hazelnut cake, parmeson cheese crackers and chocolate-banana muffins, and I'm working on making my own vanilla extract. Whew, I know. And I still need to post the red velvet cake! Would you forgive me if I directed you to lovely Joy's website where I found it? Then I can post a picture and tell you the substitutions I made: yogurt and milk instead of buttermilk, vanilla sugar instead of vanilla extract and a package of french leavening instead of baking powder (soda?). See? Easy...
Telling you all of what I ate will be harder...budino di riso, nutella, chestnut cake, apple tart, pasta, cheese, pasta, cheese, octopus salad, chicken liver pate (I should have made a record)...bistecca alla fiorentina (giant t-bone steak specially prepared in the florentine style), stinco (roasted forearm of a pig), fresh pasta with truffles, tiny tortellini in broth, tortellini filling served separately, prosciutto, mozzarella di bufala, fresh pecorino, vitello tonato...the list goes on.
This is not even including the "advanced" 10-course meal I ate in Modena at a restaurant called l'Osteria Francescana, where we were served risotto flavored with (but not actually including) oysters, raw fish with (and I'm not joking) smoke, pan-roasted black cod with black tomato sauce, a soup inspired by "the flavors of the earth" including truffles and snails, beer (!), several different wines including one made of walnuts (which I skipped, of course) and a POTATO SOUFFLE, served in a potato skin, with vanilla cream. Let's not forget the roasted, square marshmallows on wooden sticks served after the dessert, and the tiny tiny cream puffs and assorted cakes served after that. As a gift after the dinner, we were given bottles of extremely aged balsamic vinegar, for which Modena is famous.
Would you believe that those to paragraphs are only a fraction of the total amount of food I ate in the last two weeks? More to come when I get my pictures off my phone.
It's been a while...here's what's happened in the last two weeks:
1. Big meetings at work
2. Dad came to Switzerland
3. Dad and I went to Italy for a few days with a friend, they both got stuck for an extra four days because of a certain temperamental Icelandic volcano named Eyjafjallajokull. Yeah, you read right.
4. My friend Jon came to visit Lugano from Paris
5. Eating. Eating. Eating. Eating. Eating. Food. Eating.
Few! What have I baked since then? Well, for Dad a flour-less dark chocolate cake with brandied cherries and whipped cream, and after I got back, strawberry-rhubarb compote, hazelnut cake, parmeson cheese crackers and chocolate-banana muffins, and I'm working on making my own vanilla extract. Whew, I know. And I still need to post the red velvet cake! Would you forgive me if I directed you to lovely Joy's website where I found it? Then I can post a picture and tell you the substitutions I made: yogurt and milk instead of buttermilk, vanilla sugar instead of vanilla extract and a package of french leavening instead of baking powder (soda?). See? Easy...
Telling you all of what I ate will be harder...budino di riso, nutella, chestnut cake, apple tart, pasta, cheese, pasta, cheese, octopus salad, chicken liver pate (I should have made a record)...bistecca alla fiorentina (giant t-bone steak specially prepared in the florentine style), stinco (roasted forearm of a pig), fresh pasta with truffles, tiny tortellini in broth, tortellini filling served separately, prosciutto, mozzarella di bufala, fresh pecorino, vitello tonato...the list goes on.
This is not even including the "advanced" 10-course meal I ate in Modena at a restaurant called l'Osteria Francescana, where we were served risotto flavored with (but not actually including) oysters, raw fish with (and I'm not joking) smoke, pan-roasted black cod with black tomato sauce, a soup inspired by "the flavors of the earth" including truffles and snails, beer (!), several different wines including one made of walnuts (which I skipped, of course) and a POTATO SOUFFLE, served in a potato skin, with vanilla cream. Let's not forget the roasted, square marshmallows on wooden sticks served after the dessert, and the tiny tiny cream puffs and assorted cakes served after that. As a gift after the dinner, we were given bottles of extremely aged balsamic vinegar, for which Modena is famous.
Would you believe that those to paragraphs are only a fraction of the total amount of food I ate in the last two weeks? More to come when I get my pictures off my phone.
Sunday, April 11, 2010
Easter in Brittany
I went on a wee vacation to France last week for Easter. It was so much fun to see my sister and brother-in-law and their rather large extended family again! Among other things we went to the weekly farmer's market, drank tasty tea, ate galettes, brioches, eclairs, tartes aux fraises, quiche and gratin dauphinois. And let's not talk about the chocolate...dear God we ate chocolate. For my sister's birthday we made sushi and I baked a red-velvet cake with (almost) cream cheese frosting. More about that recipe (courtesy Joy the Baker again) in another post.
Rennes is adorable! The center of town is still made up of rickety-looking, tudor-style buildings that tilt this way and that, and are painted bright colors. They look like they might fall down if you exhale emphatically or look at them sideways. Rennes is the capital of the greatest province in all of France (and every last department): Bretagne! Brittany is in the Western-most region of France quite near England. It's so close, in fact, that it shares many of the ancient celtic cultural traditions of the English isles such as monolithic monuments and some traditional cuisine and dress. This unique background makes Brittany different from any other region of France. The regional language, or patois, of Bretagne is closely related to Cornish and Welsh, from (can you guess?) Cornwall and Wales. There is also a strong celtic folk music movement in Brittany which revived the old tunes and instruments and reintroduced them into modern music. Go Bretons!
What is there to see in Brittany? Well, plenty. The coast of Brittany is dotted with small fishing towns which are quaint and serve unbelievable fish platters. Periwinkles, snails, tiny shrimp, big ol' crabs, coquilles st-Jacques (scallops) and raw muscles and oysters are popular, as are my personal favorites, langoustines (like small lobster/crawfish), served steamed with mayonnaise. One coastal town you may have already heard of is called Saint-Malo. It's a walled city that is hugely popular during the summer months, when it only rains 6 out of 7 days in the week. I wish I were joking...Saint-Malo has a wonderful, rich background in piracy and smuggling to nearby England. Now the city is a wonderful place to walk, sit on an old cannon overlooking the sea on a giant stone wall, go to a fancy, purified salt-water spa, or eat kouign amann. What's that? Mmmm, let's get the the food.
Besides raw shellfish (I cannot underscore enough how much raw shellfish is in Brittany, the quantity borders on obscene), the food of Bretagne is tasty and stuffed to the brim with butter. Kouign amann is one such buttery pastry typical of this region of France. To make it you take pastry dough, and you layer it with butter and sugar and fold it a few times. Then you layer it with butter and sugar and fold it a few times. Then you repeat...fifty million times. When you bake it for a while the sugar caramelizes and creates a bit of a crust on the outside. The inside is sugary, doughy and super super buttery. It's like eating a bit of crispy caramel slathered with melting butter. Yes, that's drool you just dripped on to your computer. I know, me too. But wait, there's more. Perhaps some of you who have visited France have tasted the local delicacy known as the crepe? Well if you did it anywhere but Brittany, you were fooled! The homebase, the epicenter, if you will, of the crepe, is Bretagne. Galettes, the savory kind, are made with buckwheat flour and can contain cheese, egg, ham, spinach or shellfish, or just about any other combination of vegetable, meat or seafood you can imagine. They are creative; I think I saw a hawaiian galette on the menu last weekend. They eat the galettes with cider, not like Martinelli's either. This is hard cider, weaker than beer but stronger than water. It's absolutely fantastic. Many people enjoy a kir breton as an aperitif, which is cider (or champagne or white wine) with creme de cassis, or blackcurrant liquor. It's actually originally from Burgundy, but let's just pretend, shall we? Authentic breton all the way.
Well this is a lot more about Brittany than I was planning to write, but aren't you glad you know it now? No? Well too bad, it's my blog. Here are some pretty pictures from my trip:
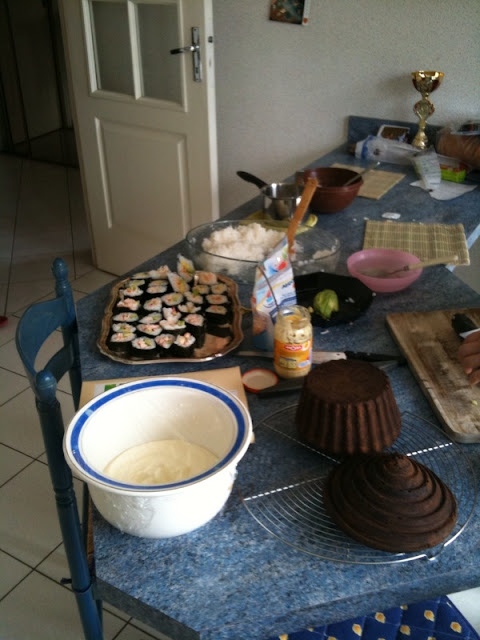


Rennes is adorable! The center of town is still made up of rickety-looking, tudor-style buildings that tilt this way and that, and are painted bright colors. They look like they might fall down if you exhale emphatically or look at them sideways. Rennes is the capital of the greatest province in all of France (and every last department): Bretagne! Brittany is in the Western-most region of France quite near England. It's so close, in fact, that it shares many of the ancient celtic cultural traditions of the English isles such as monolithic monuments and some traditional cuisine and dress. This unique background makes Brittany different from any other region of France. The regional language, or patois, of Bretagne is closely related to Cornish and Welsh, from (can you guess?) Cornwall and Wales. There is also a strong celtic folk music movement in Brittany which revived the old tunes and instruments and reintroduced them into modern music. Go Bretons!
What is there to see in Brittany? Well, plenty. The coast of Brittany is dotted with small fishing towns which are quaint and serve unbelievable fish platters. Periwinkles, snails, tiny shrimp, big ol' crabs, coquilles st-Jacques (scallops) and raw muscles and oysters are popular, as are my personal favorites, langoustines (like small lobster/crawfish), served steamed with mayonnaise. One coastal town you may have already heard of is called Saint-Malo. It's a walled city that is hugely popular during the summer months, when it only rains 6 out of 7 days in the week. I wish I were joking...Saint-Malo has a wonderful, rich background in piracy and smuggling to nearby England. Now the city is a wonderful place to walk, sit on an old cannon overlooking the sea on a giant stone wall, go to a fancy, purified salt-water spa, or eat kouign amann. What's that? Mmmm, let's get the the food.
Besides raw shellfish (I cannot underscore enough how much raw shellfish is in Brittany, the quantity borders on obscene), the food of Bretagne is tasty and stuffed to the brim with butter. Kouign amann is one such buttery pastry typical of this region of France. To make it you take pastry dough, and you layer it with butter and sugar and fold it a few times. Then you layer it with butter and sugar and fold it a few times. Then you repeat...fifty million times. When you bake it for a while the sugar caramelizes and creates a bit of a crust on the outside. The inside is sugary, doughy and super super buttery. It's like eating a bit of crispy caramel slathered with melting butter. Yes, that's drool you just dripped on to your computer. I know, me too. But wait, there's more. Perhaps some of you who have visited France have tasted the local delicacy known as the crepe? Well if you did it anywhere but Brittany, you were fooled! The homebase, the epicenter, if you will, of the crepe, is Bretagne. Galettes, the savory kind, are made with buckwheat flour and can contain cheese, egg, ham, spinach or shellfish, or just about any other combination of vegetable, meat or seafood you can imagine. They are creative; I think I saw a hawaiian galette on the menu last weekend. They eat the galettes with cider, not like Martinelli's either. This is hard cider, weaker than beer but stronger than water. It's absolutely fantastic. Many people enjoy a kir breton as an aperitif, which is cider (or champagne or white wine) with creme de cassis, or blackcurrant liquor. It's actually originally from Burgundy, but let's just pretend, shall we? Authentic breton all the way.
Well this is a lot more about Brittany than I was planning to write, but aren't you glad you know it now? No? Well too bad, it's my blog. Here are some pretty pictures from my trip:

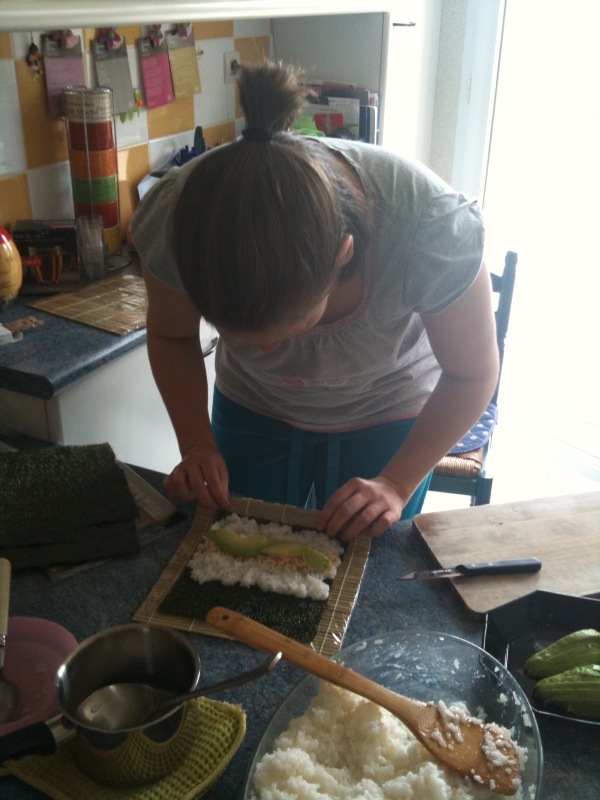


Thursday, April 1, 2010
Joy's Chocolate Fudge Brownies


For some reason I've been dying to make something delicious and chocolately the past couple of days, so when I read Joy the Baker's latest blog post on the cooking your way into a man's heart via brownies, I decided it was time to do something about it. My dear friend Sammy is always making orgasmic faces at my cooking and telling me I'm a straight man's dream but I've never found that to be the case. Maybe I just haven't found quite the right recipe yet?
This recipe from Joy is fabulous and very, very easy. I almost wish it hadn't been so easy and inviting looking, because now I have a plateful of brownies (four in my stomach) and a flight to France tomorrow. Shall I take the brownies with and try to charm my way into the hearts of my fellow travelers? Could the man of my dreams finally be seated next to me on an airplane? Seriously, I fly so frequently how is it I've never been seated near a decent guy? The universe works in mysterious ways...
Take note that my brownies came out almost too fudgey--the middle was barely set! They tasted pretty incredible with some Swiss chocolate broken up in them though.
Joy's Easy Fudge Brownies to win the heart of a man who will treat you right
1 2/3 cups (350 ml + one package of vanilla sugar) Sugar
3/4 cup (180 ml) Cocoa powder
3/4 cup (170 g) Butter
2 Tbsp. (30 ml) strong coffee
2 Large Eggs
1 1/3 cups (315 ml) Flour
1/2 tsp. (2.5 ml) baking powder
1/4 tsp. (just a pinch!) salt
Coarsely chopped chocolate bar (or chocolate chips if you're state-side)
Preheat the oven to 350 degrees F (or 175 C). Grease and flour a 10 in cake pan. Combine the butter and cocoa in a bowl of simmering water to melt, add the coffee. Whisk eggs and sugar together in a bowl. When the butter/chocolate mixture is melted and mixed, mix it with the eggs and sugar. Stir in the flour, baking powder and salt, mix until combined and add the chocolate bits. Pour into a pan and cook for 18-25 min.
A little note: I may have gotten the European proportions off because my brownies were really undercooked in the middle, even after a half an hour in the oven. They were still sinfully delicious but were not perfect. My standards have clearly slipped now that I'm only cooking for myself.
France tomorrow!
Subscribe to:
Posts (Atom)